If you’ve been using our $1 A Day Omnipresence Strategy to create new sales and client cash flow, you’ve probably already experienced how powerful it can be.
For pennies, you get yourself in front of at least 100 of your dream customers every single day, staying top of mind while building trust and authority and landing yourself in Speed Dial Slot #1 when someone is ready for help.
If you’re doing this for clients, their bottom-line is probably already thanking you and begging for more.
And luckily for you, there’s a simple way to get even more out of this budget-friendly marketing strategy that is completely free, but will supercharge your results and net you higher management fees when you do this for clients.
How?
By creating a Facebook Saved Audience and boosting your posts to that audience, instead of just to “People who like your page and their friends.”
In true No Pants Project fashion, it all comes down to going both narrow and deep by actively targeting as many of your most ideal clients as possible – and only your ideal clients.
By following these three simple steps, you can create faster, better results with a single dollar a day, to net yourself or your clients more great clients and customers:
- Step One: Going Deeply Narrow (In-Depth Ideal Client Visualization)
- Step Two: Knocking Out Systems and Setup
- Step Three: Creating A Saved Audience (Or Two) For Boosts
As with most things, the first step is both the hardest and the most critical for seeing success with this strategy… but this time, it’s also the most fun too!
Step One: Get Personal With Your Ideal Client
“Getting to know who your customers are is a crucial step for a successful Facebook Ads campaign. Facebook has 1 billion+ daily active Facebook users, so it’s absolutely critical that you target only those who are potentially interested in your product. Any audiences that are not likely to convert for you is a waste of your advertising dollar.”
When you’ve only got a single advertising dollar, you want to make every cent count.
The original Omnipresence strategy relied on the power of social connection and proof to drive traffic, interest, and conversions.
While that is still powerful stuff, not every person in someone’s network will be similar enough to them to get your power level over 9000 (Anyone? Anyone at all?) – some will be extended family, old high school acquaintances, etc.
Then consider that new pages with few followers or engagements won’t get any reach using only “People who like your page and their friends,” meaning Omnipresence won’t work for them until they build up an audience using a different, more time-intensive strategy.
Instead, to supercharge every penny we put into this machine no matter what the current audience size, we’re going to get real personal with our Ideal Client, so that we can tell Facebook the exact person we’re trying to get our content in front of and attract:
“We’re going to say, ‘Facebook, this is who we’re looking for,’ and bundle it all together into something we call an ‘audience’. So we’re going to be talking about demographics and psychographics and interests and bundling it all together to say, ‘Okay, go find someone that looks like this, because that’s who I want in my business.’ Then Facebook does the hard work and finds who we’re looking for.”
– Mike “Using Laziness To Fuel Efficiency Since ‘09” Shreeve
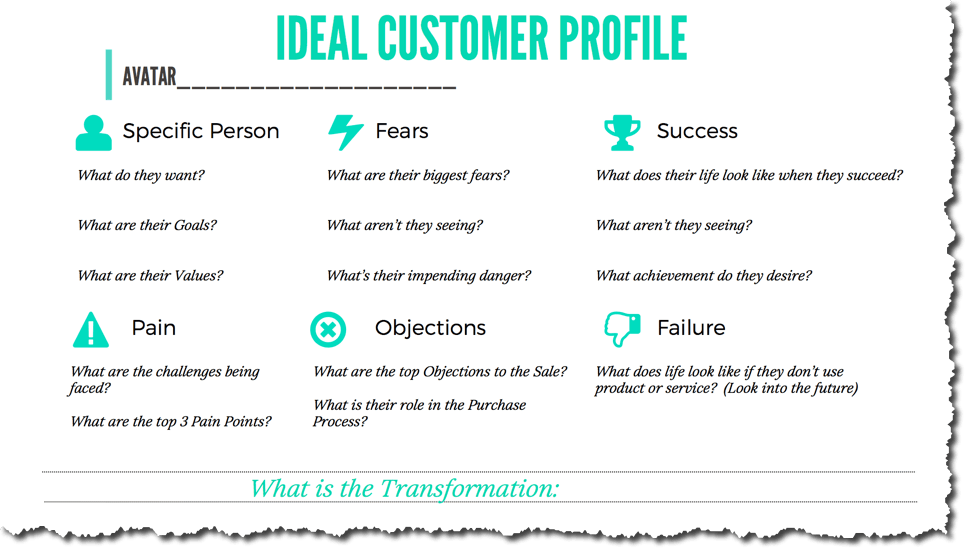
To do this, you need to choose ONE ideal client to help and then dive deep into who they are and what makes them tick.
If you come from a corporate background, I want you to take a “Root Cause Analysis” approach with this, meaning that for every question you ask yourself about your ideal client I want you to go a few levels deeper with it, asking “Why?” until you can’t go any deeper because you’ve hit on foundational principles, beliefs, and personality traits central to their identity.
If you spend the time doing this to the best of your ability, the understanding this will give you of your ideal client and audience will turn client-getting and sales-making from a spartan obstacle race to a walk in the park – no matter what marketing and sales strategy you’re using at the time.
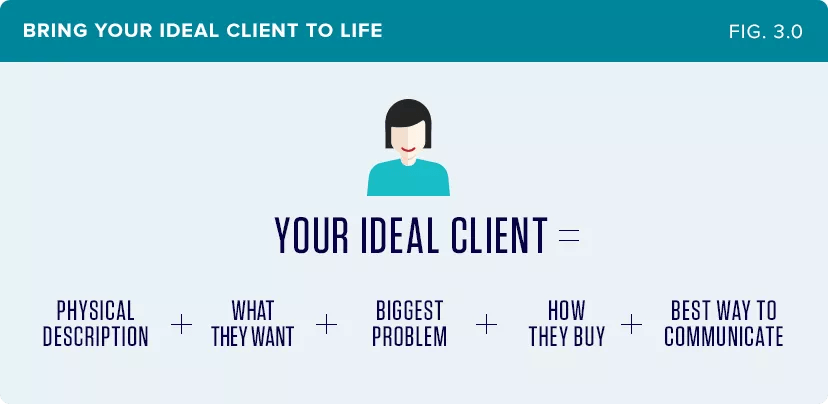
In line with the aspects of a person Facebook will be looking for your direction on, here are the key areas you want to be visualizing during this exercise:
- Demographics:
- Age, Gender, Marital Status, Education Level, Location, Income Level, etc.
- Goals & Values:
- What does your ideal client aspire to? Why? What do they value?
- Inputs and Information Sources:
- Who are they listening to? What are they consuming? Books, magazines, YouTube channels, blogs, gurus, tools/resources, organizations and conferences – Be specific! Use Google to get even more ideas within your niche.
- Challenges and Pain Points:
- What is your ideal client struggling with right now? What’s in their way? What are they missing? What’s causing them pain, personally and/or professionally? – This is where your “whys” are going to come in handy.
- Objections:
- What have your ideal clients objected to in the past? Why didn’t they buy? Why didn’t they buy sooner?
- Role in the Buying Process:
- Are they the sole decision-maker? Do they need to consult with a boss, or are they the boss? Do they need to consult with a spouse? Business partner?
If you want to do this well, you’ll need to dedicate a good couple hours to this exercise, but I promise it will absolutely be worth it.
It can even be enjoyable as you explore your ideal client and come to an even better understanding about what makes them so ideal for you (or for your client), and learn a little more about yourself as well.
“The very first thing that I like to do is just try to be empathetic and put myself in the shoes of this person. I literally just pretend I’m in a day of their life: what are the tools and resources that I’m using? What are the magazines I’m reading? What are the organizations I follow, what kind of behaviors do I exhibit, topics, gurus, all that good stuff.”
– Mike “Empathy is Everything” Shreeve
This brainstorming and empathy exercise will literally become one of your most valuable business assets, so really take the time to explore.
Go to sites like Goodreads and Amazon to look up books similar to or related to some of your niche’s heavy hitters.
Use Google to explore what kind of tools would be helpful for your ideal client, what organizations they might belong to, what magazines they might subscribe to, and so on.
Check out LinkedIn and browse through their groups to see which ones your Ideal Client might join, what kind of information they would be exposed to inside, who they would be following, and who has a lot of influence in your niche.
This will all be critical information to help you get your boosted posts in front of more ideal clients, so the more effort you put in now the more success you’ll see later.
Step Two: Set Up Your Facebook Business Manager
If you’ve already started boosting posts for Omnipresence power, you should already have a business page set up and a Facebook Business Manager account.
If you’re just getting started, you’ll need to do this now.
But don’t worry, even though the Facebook Business Manager sounds a bit intimidating, we’ll be in and out before you know it, and without a single stop in the vortex of confusion and overwhelm commonly known as the Ads Manager.
Facebook walks you through the creation of a business page step by step, right here.
Next, you can jump through here to sign up for your Business Manager account.
There is A LOT going on in the Facebook Business Manager, but you don’t need to worry about most of it when using this strategy – so don’t let it intimidate you!
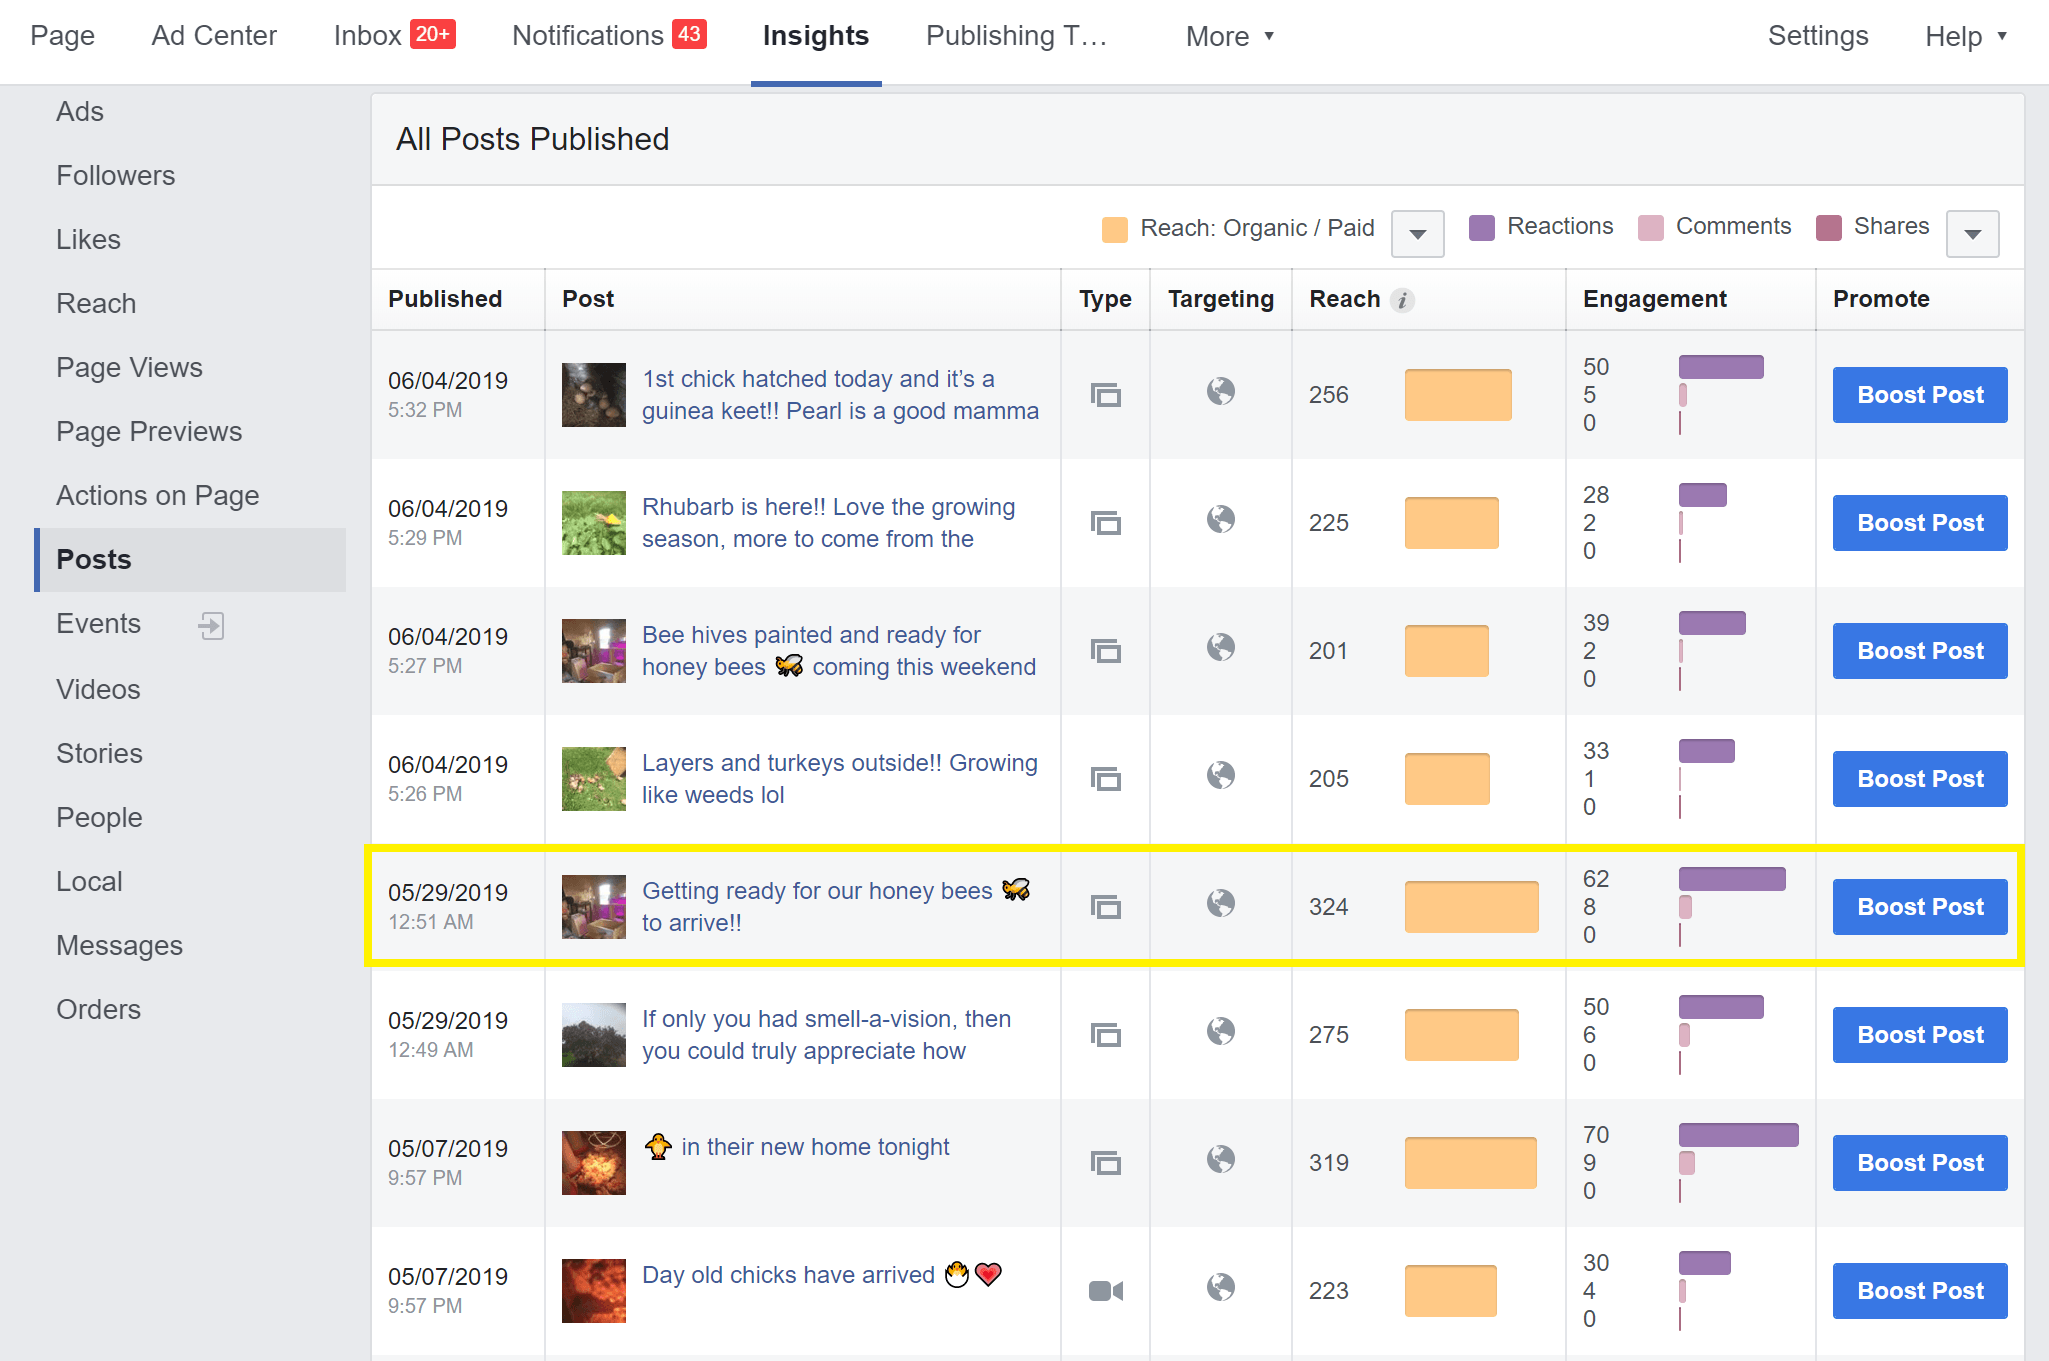
While you can use this tool to get deeper insights into your boosted posts (or ads, should you go that route later) you can find the high-level version of that information on the Insights tab of your Facebook page.
All we need the Business Manager for is creating a saved audience, which is exactly what we’ve been waiting for.
To get back to your Business Manager after you’ve set it up at any time, go to: https://business.facebook.com/.
Once you’re locked and loaded in the Business Manager, it’s on to the final boss – and all the ROI loot on the other side!

Step Three: Create One Or More Audiences Based On Your Ideal Client (Walkthrough)
Let’s. Get. Technical.
TECHNICAL!
I want to get technical with you… so you know exactly what to expect and look for as you set about creating your saved audience.
First, get out your notes from the brainstorming session you did back in Step One – this is where we take all that gold you gathered up earlier and put it into the Facebook machine so it can spit out ideal clients one after another while you do something way more fun with your time.
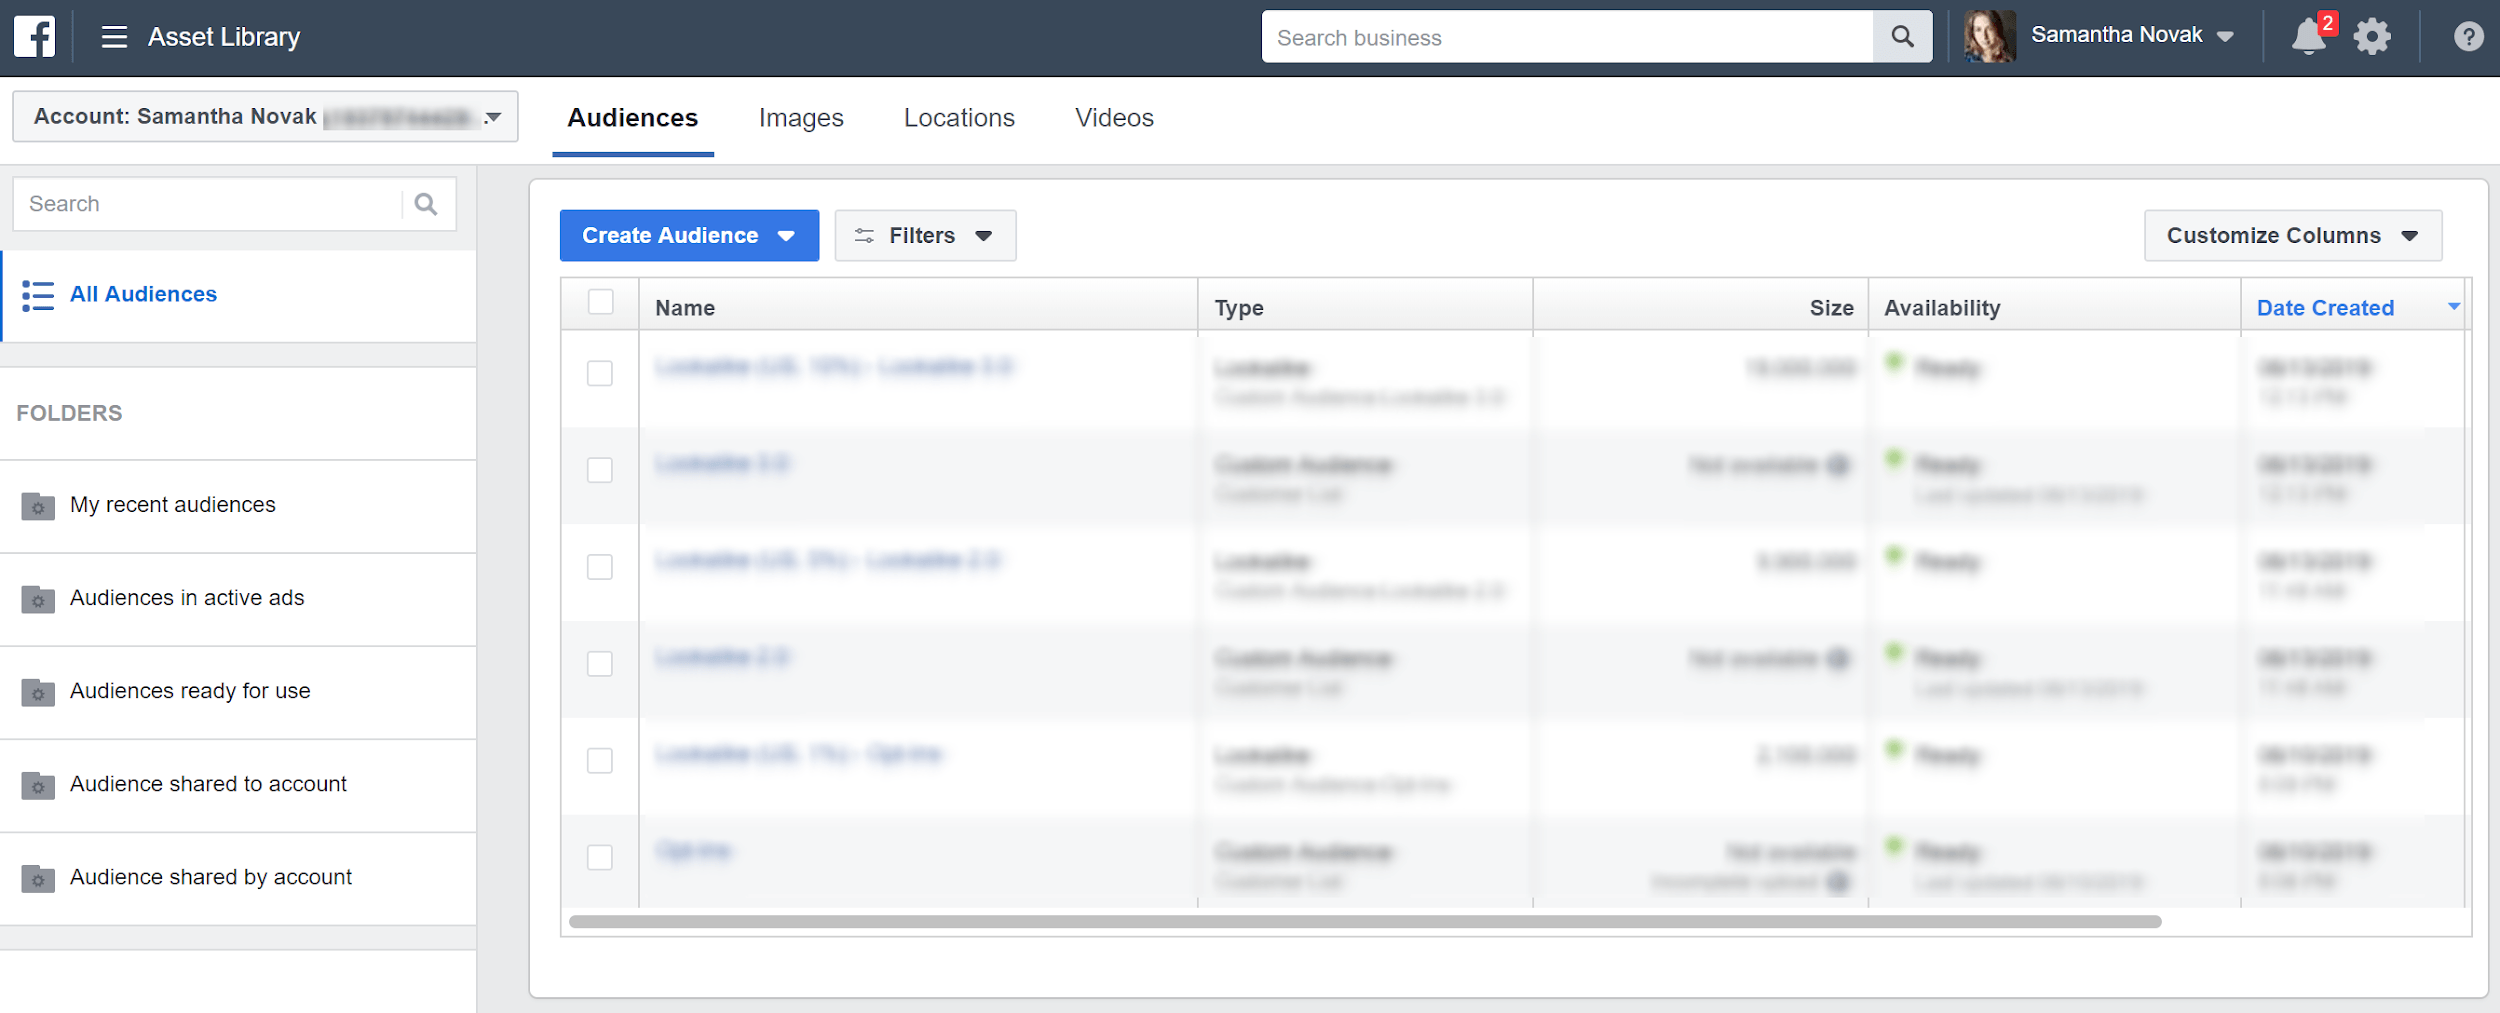
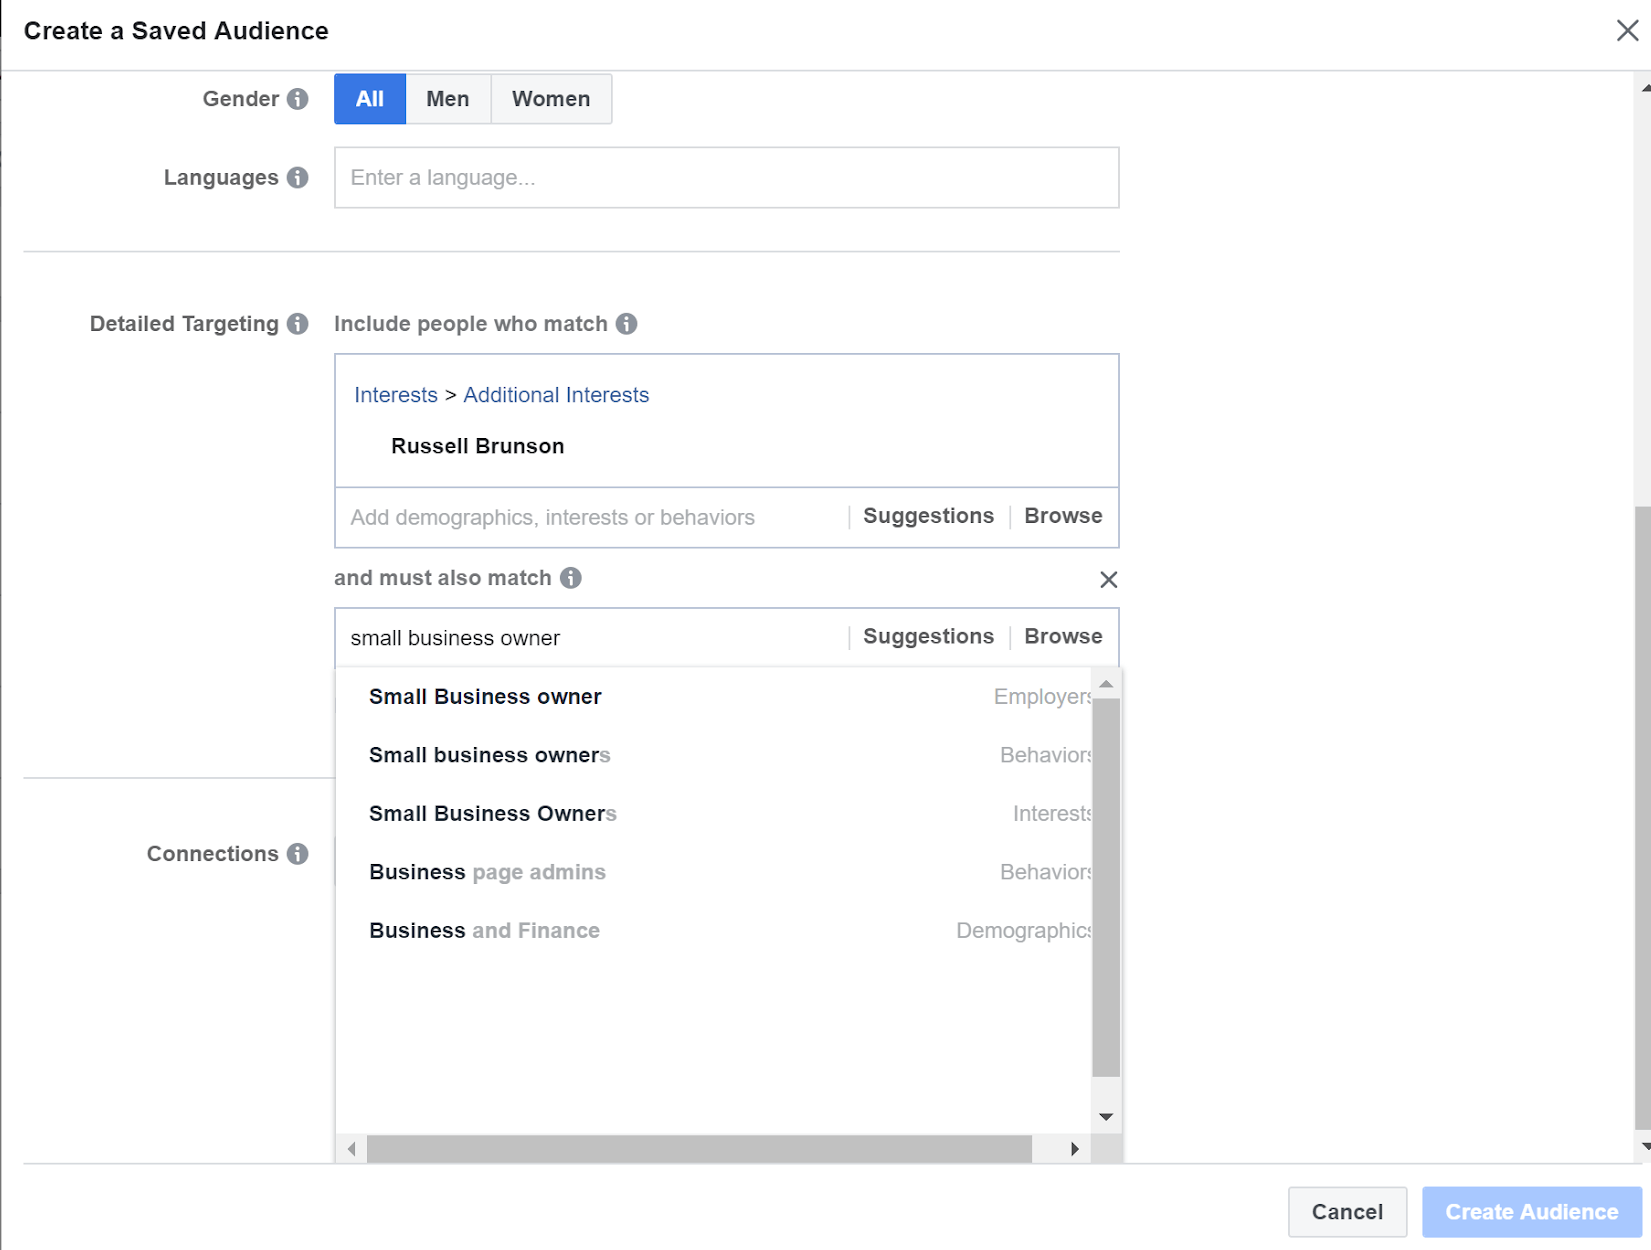
Next, open up your Business Manager, click the three lines in the left-hand corner to bring up the menu, and select the “Audiences” option in the Assets column.

You should land here, but with your face in the upper right corner instead of mine:
Then, you’re going to click the big blue “Create Audience” button, select “Saved Audience” from the drop down, and see something exactly like this (unless you don’t live in Canada, in which case your Location will be set to your home country):
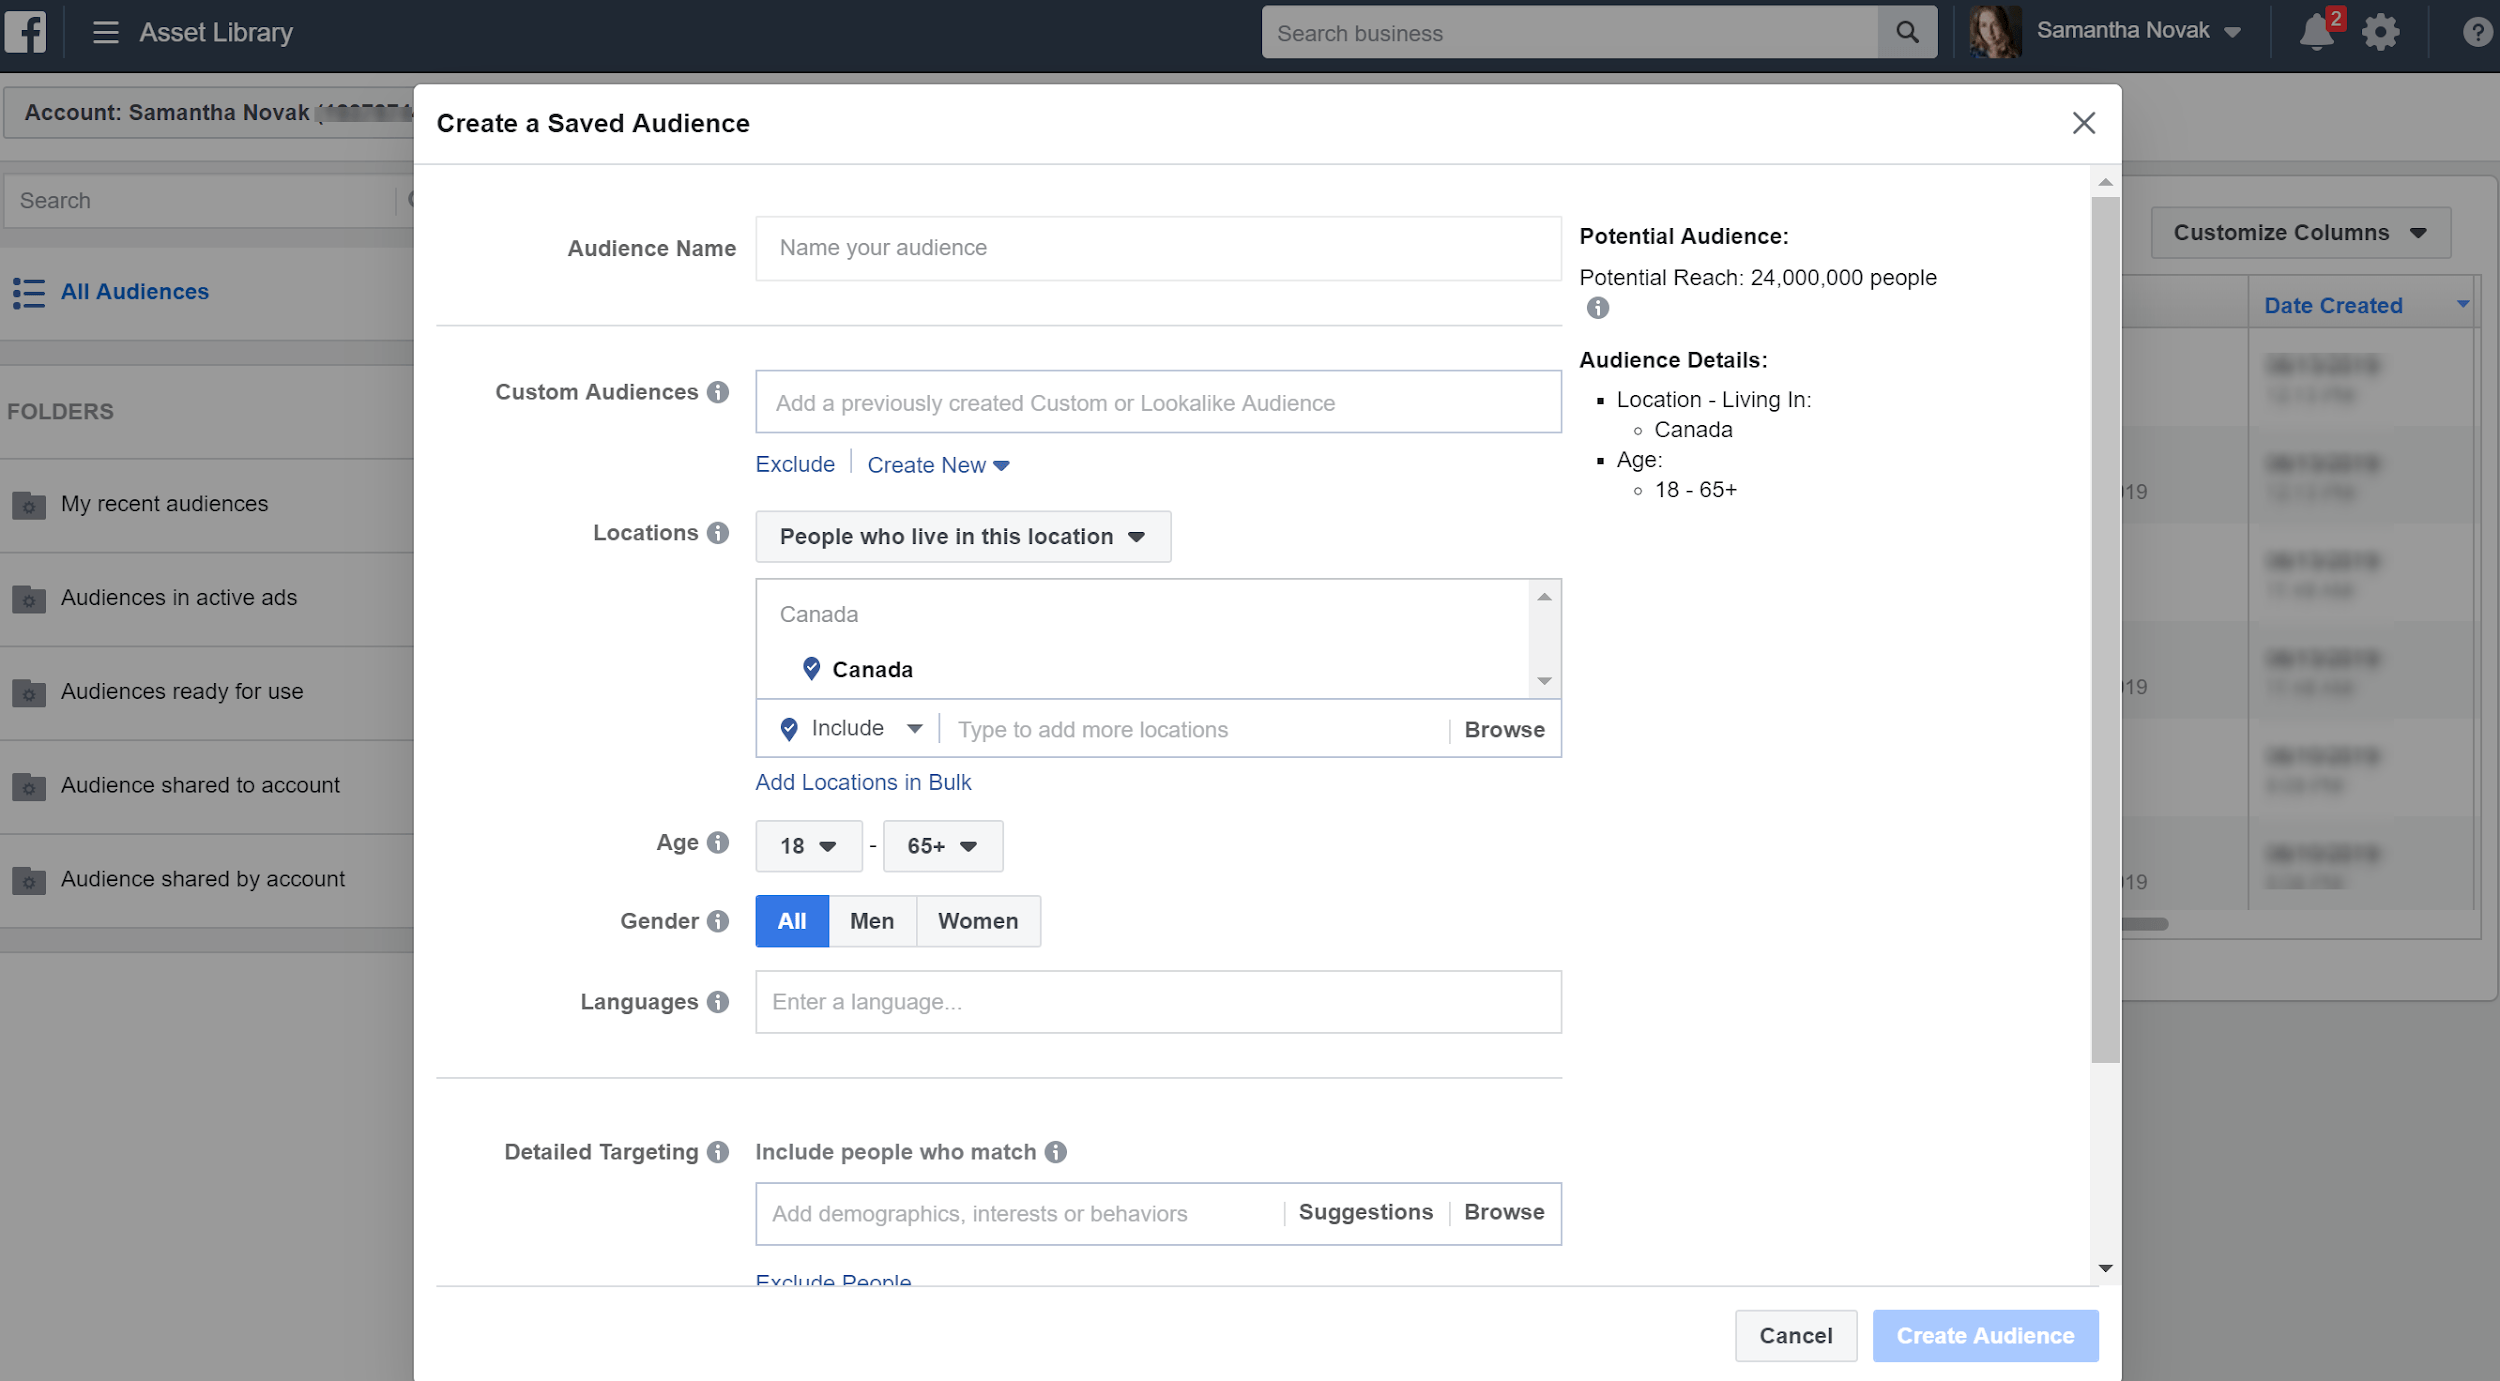
Now it’s time to fill in the blanks to create your perfect Ideal Client targeting audience for post boosting, using the Ideal Client brainstorming and visualization exercise results from Step One.
Let’s go through each field:
- Audience Name:
- This can be anything you like (“Best People In The Whole Wide World”?), but should be named in a way that ensures you know exactly which ideal client is being targeted so that later when you want to do some testing, you can easily identify which audience is which and what the defining differences between them are.
- Custom Audience:
- Skip this – custom audiences are very handy, but are a more advanced targeting technique than we’re looking for right now. They are built using data from your website, such as people who have visited, looked at a certain blog post, or opted in for a particular lead magnet. But they require some extra technical know-how and customizing your site’s code for tracking purposes, so we’ll leave that for another time.
- Location:
- If you’re a local business, this is where you need to specify the particular area you’re looking to drive clients from. If not, use this section to narrow your audience down to countries and areas where you speak the same language(s), such as the United States, Canada, the United Kingdom, and Australia and New Zealand, if English is your primary language.
- This is also a good time to set a boundary for time zones you’re willing to work with. For example, if you’re in North America and you opt to show your boosted posts to potential clients in Australia and New Zealand, that means you’ll be working with clients 14 or 15 hours ahead of you – which can complicate things. Keep that in mind if you have strict times set for when you work, when you take calls, etc.
- One last note here: the default setting is “People who live here,” but there are other options. Notably, if you work in the travel and tourism industry you can target specifically “People traveling in this location.” The other two options are “Everyone in this location” and “People recently in this location.”
- If you’re a local business, this is where you need to specify the particular area you’re looking to drive clients from. If not, use this section to narrow your audience down to countries and areas where you speak the same language(s), such as the United States, Canada, the United Kingdom, and Australia and New Zealand, if English is your primary language.
- Age, Gender, & Languages:
- This is where you’re starting to pull from Step One – if your ideal client is a specific gender or age, this is where you’ll want to specify that. For example, if you target “Mompreneurs”, you’ll likely want to set your Gender to female and your age range to between 30 and 50, or thereabouts.
- If your ideal client isn’t a specific age or gender, you’ll probably just want to ensure they speak the same language(s) as you, and leave the other demographics at their default settings.
- This is where you’re starting to pull from Step One – if your ideal client is a specific gender or age, this is where you’ll want to specify that. For example, if you target “Mompreneurs”, you’ll likely want to set your Gender to female and your age range to between 30 and 50, or thereabouts.
- Detailed Targeting:
- This is where you’re going to bring over everything from your ideal client visualization exercise, including:
- Interests
- Occupation
- Industry
- Authors they read
- Gurus they follow
- Books they love
- Tools and resources they use
- Type everything into the Detailed Targeting box and see what comes up with matches in Facebook’s database. Then, use the “Suggestions” button to see what else Facebook knows is similar that may be applicable to your ideal client, based on what you’ve already put in.
- Note: you can use some of these options to narrow your audience by telling Facebook that your ideal client has a certain interest or behavior, but also MUST match a different interest, behavior, demographic, etc.
- This is where you’re going to bring over everything from your ideal client visualization exercise, including:
For example, if you’re targeting someone interested in Russell Brunson, but who is also an entrepreneur, you could type “Russell Brunson” in the Detailed Targeting box, click the Blue “Narrow Audience” option underneath, and type “Small Business Owner” into the second box that appears to ensure you’re not showing your posts to marketers with full-time gigs at corporations.
Play around with this to get the best possible match for yourself or your clients.
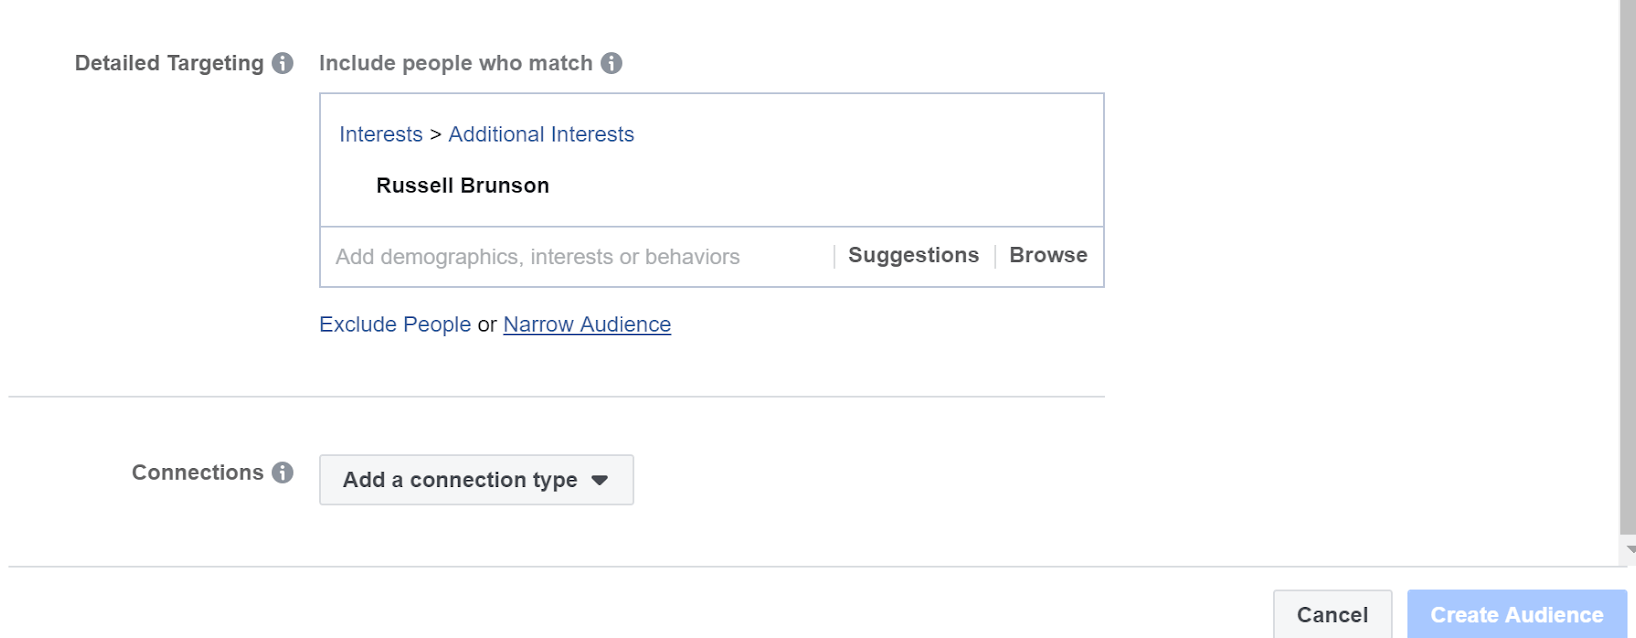
-
- As you add more interests, behaviors, and demographics to the detailed targeting section, Facebook will estimate your audience size.
Mike says:
- As you add more interests, behaviors, and demographics to the detailed targeting section, Facebook will estimate your audience size.
“They say the magic number for Facebook’s algorithm in terms of what your audience size should be in order to maximize the odds that Facebook is going to find your perfect people from any given set of audience parameters is this simple — it’s a half a million to 3 million in size.”
-
- If your or your client’s business is local, you will be handcuffed by the population in your local area, so try to cast a wide enough net or target densely populated cities or suburbs near you.
- And if your audience becomes too large, go back and weed out any interests that were “reaching,” or that you’re not completely confident belong to your ideal client, until you have an audience no larger than 3 million. You can use these other interests, behaviors, or demographics in another saved audience and test them later.
- Connections:
- This is where we add back in the social connection and proof elements from the basic Omnipresence strategy, if you want. You can play around with custom options here, but the basic options include “Friends of People Who Like Your Page,” which can come in handy as your page grows.
And after that, all you do is hit that magical “Create Audience” button and you’re done!
You’ve now got an audience chock-full of ideal clients – and almost nobody else – just waiting to discover you through your Omnipresence content.
To use your saved audience when you boost a post, follow the instructions in our original Omnipresence walkthrough, but choose your saved audience instead of “People who like your Page and their friends” from the list of audience options (you may need to click “See All”).
When you’re testing a new saved audience, treat the boosted post as you did when you were first testing it, with a budget of $1 per day for 7 or 14 days ($7 for 7 days, or $14 for 14 days), and keep an eye on how it performs.
Remember, the benchmark you’re aiming for is 100 impressions per day, which means that your boosted post is being seen by 100 of your potential ideal clients every day.
And as always, keep testing different content pieces, and now, different saved audiences, to figure out what works best for you or your client.
For a refresh on all the details about the metrics you should be tracking and the results to look for, check out the original Omnipresence strategy walkthrough.
[Bonus Reading: If you’re ready to get even deeper into Facebook ads, check out our post Creating Successful Facebook Ads In Two Parts: A Freelancer’s Guide To Media Buy Like A Pro. You can use this Saved Audience method for your ads too!]
In A Rush? Here It Is, Snack Sized:
If you’re looking for faster, better quality client-getting results on a budget, you’re going to want to supercharge the $1 A Day Omnipresence Strategy for maximum impact and efficiency.
To do that, set aside 2.5 – 3 hours on a slow day or free evening to follow these 3 simple steps:
- Step One (2 hours): This is your most important step. It’s all about diving deep into the psyche of one, very specific ideal client for yourself or your clients.
Approach this like you’re a hero trying to get one step ahead of the antagonist, asking yourself how they would think, where they would go, what they would do in different situations… until you’ve got a list of personality traits, behaviors, interests, and quirks that are hyper-specific to the one ideal person you want to work with in your business.
- Step Two (15 minutes): Get yourself a Facebook business page if you don’t have one yet, and Facebook Business Manager (or help your client to do this for their business).
Follow Facebook’s simple step-by-step process to knock this easy step out, and then head on over to the grand finale…
- Step Three (15 – 45 minutes): Create a Saved Audience in the Facebook Business Manager by dumping the results from Step One into Facebook until you’ve got an audience of ideal clients between 500,000 and 3 million strong.
Then let Facebook take over all the hard work of going out and finding them, showing them your stuff, and building you an audience of loyal fans and new clients.
With this, your boosted Omnipresence posts and offers will be shown ONLY to your (or your client’s) ideal clients, ensuring that every single cent of your marketing dollar is being used as efficiently and effectively as possible.
To start using your audience, just select your brand new audience from the list of possible audiences Facebook gives you when you set up a boosted post, and then run it as a test for 7 or 14 days at a $1/day.
Having a hard time coming up with powerful content ideas to post on your page and boost to your new saved audience? Check out these posts:
- 21 Ways to Attract Your Dream Client With Easy-To-Make Content
- Supercharge Your Content With Brain Science (Checklist for How to CARE)
Once you verify the boost is performing well with the new audience, you can set it to run for longer time periods and start creating new audiences to test out with your new content.
A bonus side effect of using a Saved Audience instead of basing your boost on people who already like your page and their friends, is that you’ll very likely expose your content to a lot of people who don’t yet like your page.
When they engage with your boosted content you can then invite them to like your page, and grow your community as well as your Omnipresence!
Lastly, remember that you want to be sure that each boosted post is reaching at least 100 people every day, or in Facebook terms, is getting 100 impressions each day – if not, you should be testing a new piece of content or a new audience until you hit that threshold.
And that’s that!
With this, you can use Omnipresence with even more success – no matter the initial audience starting size for yourself or your clients.
Want More?
If you’re looking for even more freelance business-building help, guidance, training on new service offerings, and step-by-step client-getting strategies, join us inside The No Pants Project, where we’ll share everything you need to build your own $26,500 Per Month Freelance Business From Scratch.